Wednesday, October 30, 2013

Thank You

Probably one of the most difficult things I have to do every week is balance family, work, and shop time. It's a delicate balance, to say the very least. Now that I've added blogging to help chronicle my endeavors for my little one who is on the way (sure it's a little selfish/hopeful to think he/she will have the slightest inclination to see how I learned) and to give me something to look back and reflect on, it just makes things that much more difficult to juggle.

I have to say that none of it would be possible without my wife. Her patience with me and my hobby/addiction is completely amazing. I think she knows and accepts--though she may not understand--that I would love to be in the shop after I get home from work. Even if it's after 8 PM like many nights, I could easily walk into the shop for the next couple hours, shower, and hop in bed, my mind still whirling around the project in work or the next one on the list and what I could get done the next night.

Dinner? No biggie, I ate twice today already.

It's tough, and I know a lot of other people have to deal with the same thing, whether it be woodworking, writing, painting, or anything else that people find in their lives for which they have a passion. Fortunately for me, my more accepting half is somehow alright with me spending an entire day of a weekend and often much more--almost every weekend--in my shop.

So thank you to all of the people in our lives who deal with us at our most inattentive. We couldn't be this messed up--or happy--without your support.

And now that the shop is just about back in order, it's time to start looking at other legacies for my little one...something made with love and wood...


Josh

Tuesday, October 29, 2013

More Shop Storage - Nail/Screw Holder

I don't like walking around my shop just to grab stuff I use almost every time I'm out there. That has led me to my mission to get more organized. I was using peg boards, but it just wasn't enough, and if you didn't want to pull the pieces out of the board every time you pulled off a tool--or just wanted to reorganize everything--it was a pain in the rear.

So I've been on my mission. This time it was screws and nails. I hate digging them out of my toolbox. I really wanted something that was within easy reach of my bench, plus give me a place to keep things off of my bench while I'm working and this is the result. It's a single board about 5 inches wide with dados cut into it to allow for the small shelves.

I don't own a table saw--and really don't want one--so the dados would have to be cut by hand. This is the first time I've really done this on something other than practice, so I won't say I was nervous, but I was extra careful on the first one.

I started the dado by knifing my lines at 3/4". I set my first line, then used the actual shelf board to mark the other side. Marked the lines with the chisel and then made a second cut with the chisel to make a "V" for the saw to ride in.
Then sawed to the marked depth in each of the lines. Going back with the 3/4" chisel and chopping a little all the way down really made removing the waste simple.
Then the router plane quickly takes care of the rest...
This first one took about 20 minutes, but the others were about 5-10 minutes apiece. Easy...
And then it's just cutting the shelves to length and gluing them in. Doesn't get much simpler! Oh, and adding the cleat on the back to hang it from. I just used an off-cut piece from one of the other cleats. Up on the wall it goes!
An easy project completed, but I really enjoyed the practice. Besides, it's useful and only took about an hour. I'm sure someone can figure out another use for it too.

--Josh

Sunday, October 27, 2013

Video of the Clamp Rack Build

For anyone interested in yesterday's blog, I actually took a few extra minutes during the clamp rack build to video the process. Not every project is very entertaining or exciting, and this one is probably no exception, but if you're looking for a quick how-to on this one, then here it is!

Only thing I suggest is if anyone wants to build this on their own...plan your clamp spacing better than I did. Luckily this is about $5 in lumber, so I can easily make a new one if this one gets annoying. My big clamp rack will be much better planned.

So go ahead and click on the video below to check out this very basic build.


Saturday, October 26, 2013

More Shop Storage-Quick Clamp Rack

Everywhere you read about woodworking, there's one (of many) common threads: you can never have too many clamps. I have to agree. Almost every other project I work on, I think to myself--at least once--that it would have been a lot easier if I had another clamp. This has led to my being the proud owner of about 20 F-style and Quick Grip clamps. In building my table for my belt/disc sander, I incorporated some through rods that allow some clamps to just hook over it, and then the other clamps just rest over the edge.

It's not the prettiest, but it definitely works. It's a table I don't use every day in the shop, so the clamps remain out of the way. What I don't like, however, is that when I do use the clamps, I sometimes accidentally pull others off with the one I wanted. I also have to bend down to get the quick grips. Not so cool. I don't like bending down and reaching blindly for my tools.

Since I've been building shop storage stuff, this is next on the list. I had several ideas, so now all that's left is to try out an idea I've got for a 2x6 and some 3/4" dowels. I happen to have those handy.

Basically I just took the 2x6 and drilled some 3/4" holes. I didn't go all the way through so that the glue wouldn't spill out the back and create a mess I'd have to clean up later.
Then I planed it. I should have done that first because it was a little warped. This will make it look better, but really this is just a personal preference. I mainly just like using my planes. It's amazing how you can make construction lumber look completely different with a sharp plane and a couple minutes of elbow grease. My shop storage stuff is more functional than anything else. This one is really just that....practical.
Next is the big rip. 45 DEG for the french cleat to match what is already on my wall...I wish I had a better rip saw, but my inexpensive Japanese pull saw will work just fine for this...
Then I clean up the angle from the saw cut. This will true up the edge and make a smoother surface to rest against the piece on the wall.


Done with the block plane and jointer plane...
Then glue up the cleat to the main piece...
Glue the dowels in the holes...
And then put it up on the wall and start loading it up...
My placement was wrong on the dowels....oops. but it works. If I think I need another one, it's about 2 hrs of work (and that was mainly waiting for the glue to dry.

Now on to the next one...for my parallel and pipe clamps...the wall doesn't like them leaning...

Wednesday, October 23, 2013

Shop Storage: Cordless Drills


So I was able to finish up the cordless drill holder that I had started prior to my trip to Tucson. I used joints that weren't needed (dovetails) and added some curves and bevels where they weren't required (this is going to sit in my shop) and enjoyed the build and learning process quite a bit. I would definitely recommend the addition of "unnecessary" joinery and fancier features if for nothing more than excellent practice.

This tool holder sits on my wall using the french cleats that I had mounted a couple weeks ago. It holds 3 drills, plus their batteries and chargers. They sit right at the front of my workbench so they are within easy reach. Why are there 3? Well, it's what I had, of course. Plus, having more than one cordless drill let's me keep from having to do multiple bit/drill changes. It also keeps all the gear in one place.

In making the cabinet, I dovetailed the sides onto the bottom. It's strong more than what's needed, but hey, it's practice.


I also decided I'd try beveling the mounting piece that the drill motors rest in. Why? Well, because I haven't tried it before, and I'm sure I'll need to do it for a nicer project in the future. I did them all with a block plane. I started with a different one, but the block plane felt really good for this process. Next time, I know to start with bevels on the ends first, so that way if there is any tearout, it will be removed when I bevel along the grain.

To protect against tearout, I also clamped a backing board in line with the piece between a dog and my end vise.

And now the finished bevel looks pretty good for the first try.

And then I squared up the mating surfaces where this beveled board will rest with my shoulder plane.

Finally I glued it together and mounted it on the wall.

Next step is to mount the outlet underneath so all the cords are out of the way....there's always something else! 

Until next time....

Josh


Sunday, October 20, 2013

Back to the Pole/Flywheel Lathe!

 So this weekend I was able to get back into the shop! It had been 2 weeks since my last foray, and I have to say I missed it. I actually found myself a couple times heading out to the shop late in the evening and looking at the unfinished projects, wishing I had time to do a little work, trying to figure out which project was going to be next.

First project (with a lot of help and a push from my buddy) up on the list was the pole/flywheel lathe which had been out of commission for the last month or so. For those that don't know, I had built a "normal" pole late earlier this year, and did it on the cheap, not knowing if I would even like doing lathe work, but liking the concept and figured it would be fun to build. It was fun and I did like it.

So then came a friend of mine over to the house and I had to show off my new contraption. The first comment off his lips was "Cool, but where's the motor?" You have to understand my friend: as much as I enjoy dealing with wood, his passion is metal. Of course he was joking (at least halfway), but his mind immediately started working on how not to waste half the motion as the machine "resets" after every press of the treadle. I started doing research and he started turning ideas over and over and we finally came to create a lathe that uses the spring pole reciprocating action to turn a freewheel bicycle hub to turn a flywheel...and why not use a real VW flywheel that is just laying around? Cool. This thing turns so fast that it just hums. It's awesome. So we did it. And I broke it. I think the bicycle hub was already worn, but hey, it was on my watch.

And now we are to this weekend. After several discussions, we realized that there is always room for improvement, so we made those improvements after locating another ratcheting freewheel bicycle hub to replace the original.

It is nice. I like it a lot, and I could not have done it without my buddy pushing me to keep making it better and his metal know-how. Thanks! Now I can get back to some of those lathe projects I had planned. It was so nice to hear the hum coming from that flywheel. Speed! MORE SPEED!!

So that was day one, and working on this project in my trashed/torn apart shop drove me nuts. Have to get back to putting it all together again....until next time!  Josh

Here's a little video of the lathe in action:


Josh


Monday, October 14, 2013

Back Home


PhotoI do have to say, though, as busy as we were this weekend, when I unpacked my new Veritas carcase saw (rip), I couldn't wait to get into the shop and at least cut a tenon cheek with it. So that's exactly what I did. Went into the shop, made one cut, sighed, looked around the mess that is my shop, sighed again, then gently placed the saw into its new home in the saw till on the wall and turned and returned inside.

No matter how nice a trip is, there is always that feeling of contentment that hits as soon as you walk through the door of your home to confront the pile of stuff you dropped in the foyer as you emptied the car from the travel chaos. It didn't fail me this time either!

My wife and I had a great trip to Tucson and I finally got to meet some of her family for the first time. It was definitely a weekend well-spent. Some tourism, family, and friends, and a short 4 days later it's back to the daily grind. It's definitely something we'll have to be doing again in the near future.


That one cut didn't tell me a whole lot, other than it is capable of a smooth straight cut, but it did whisper of things to come. It also whispered that I should go ahead and stay out there and that there was plenty of time before bed for me to play...and it was persistent. BUT, I also--at the same moment--remembered that I was married and that pile of stuff in the foyer could alter how happily that would continue.

And so I waved goodbye for the evening to all my friends in the shop and promised everyone that I'd see them very soon...amazingly similar to my goodbye several hours earlier. Sadly, I realized I must be getting good at them...hopefully "Hello!" follows shortly!

Wednesday, October 9, 2013

Time for Travel

It looks like it's time for a little drive. Tomorrow my wife and I head to Tucson for a family event, which should be a good time for everyone. I'm looking forward to meeting this part of the family for the first time, but I also have another goal...

Here in my part of the Arizona desert, the closest woodworking store is about 3 hours away, which means I haven't been to one since I've started woodworking, other than a really quick trip with my brother and nephews when we visited in St. Louis a couple months ago. I had seen some of the chisels online and several had pretty good reviews, but I really hate buying new tools without having held them in my hands or using them in the ways that are comfortable to me. I hope to get a little bit more exposure to some of these tools (and hopefully some others!!) that I'm looking at purchasing at some point in the near future. I've been able to get a couple through used channels, but have had a little difficulty in finding chisels that felt good in my hand. New may be my best option for these tools...we'll see.

This goes hand-in-hand with my philosophy on woodworking tools. I've watched my low-budget tools serve me well for the last year and I'm now ready to replace them with some higher quality tools. I know now what I'm looking for in some of my tools. Chisels are one of those things I'm ready for. I had the opportunity at the Woodcraft in St. Louis to try out a few of the Stanley Sweetheart chisels, and I really liked the weight and feel of them--as well as the slim profile--which will be a nice change for me while paring between pins and tails.

Who knows, there could even be a new saw in my future. I have been keeping an eye out for a decent carcass saw or dovetail saw. Those Veritas saws felt really good in my hand last time....

Monday, October 7, 2013

My Thoughts on a Beginner's Tools...NOT to be Confused With the RULES for Buying Tools

In a previous post I talked about some things that nearly everyone on every blog with tell you to avoid. Cheap tools. In many ways, I can understand the reasons behind steering clear of cheap, low quality tools. First of all, they don’t work as well. They also may not hold an edge for very long, so you wind up sharpening….and sharpening….and sharpening. But I would pose an argument that there is a positive side to inexpensive, poor quality tooling--and no, not just learning to sharpen. As in all things, I believe there is a time and place for just about everything.

No I will not say that everyone should buy this or buy that. That is up to the user. I could really care less if you’re using the latest and greatest chisel or saw from LV or some cheap Chinese knock-off. I believe in personal choices in regards to tools, and I don’t think there is a “one size fits all” method of buying tools. If you want it and can afford it, buy it. It keeps the economy moving. Good for you.

But here are just a few thoughts that I have. Please, bear with me…

My view on cheap tools is very similar to my thoughts on University education. Yes, I am a college graduate. I spent 4 years in school taking classes that honestly have nothing to do with what I do today, and I love what I do and I make a good living doing it. I hate to tell my folks this (no they didn’t pay for all of my schooling, though they helped. I’m still doing that 15 years later), but I wasted four years worth of education at an average priced private college. Oh, and I didn’t get my degree with those years. Awesome. I had changed my major about 3 times in those 4 years, and kept just shelling out or borrowing more and more money. I had to have it right? When you’re 18 that’s exactly what you have to do: leave home, go to school, meet a girl, get your degree, get a job, get married…and so on and so on. At some point I realized that I don’t like throwing my money away.

People ask me today for advice about their kids heading off to college and here is what I tell them I would have/should have done: Community College. Suck it up and keep them at home for another two years. Let them figure out what direction they want their life to start down before you start shelling out the big bucks for what will then only be half of a 4 year degree. This gives them time to get used to school, the less rigid structure, and take some classes and get some experience to find out what they like. There’s no guarantees that what sounds like a good idea at 18-19 years old will still be a good idea at 21-22. Sure, we all wanted to run away from home and start striking out on our own, but was that really the smart thing to do? For some? Sure. Others like me? Nah. Same thing goes for woodworking or any other hobby.

Not everyone is going to like woodworking. Shoot, some people may decide after a couple projects and a month or two in the garage that woodworking is really more of a 3rd or 4th hobby or “nice to have in your back pocket” kind of thing rather than a real passion that will want to soak up every bit of free time you can squeeze out. There's no shame in it. We all try things and then realize it was fun, but just not for us.

Now think about it. If this is just a “it’s nice to know” kind of thing, do you really want to buy that $2000 cabinet saw that everyone is raving about? How about a set shiny planes that are the envy of every woodworker? Wow, very cool. Some people will. Go for it. I wish I could do that some days, too. I’ve seen plenty of garage sales and notices with people selling their stuff that I’m sure looked like at really good idea at the time. I like those guys. I buy a lot of stuff from them.

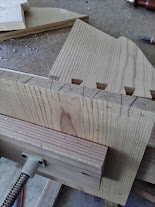
This is where I say to the people just starting out: Don’t go crazy and buy the best tools out there. Not yet, at least. You don’t even know what you want. You’ll find out soon enough, I guarantee it! So do some searches, read some reviews on some less expensive tools. Cheap tools can work just fine, and there actually some good ones out there that don’t cost a body part. They take a little bit of work to get going sometimes, but they do work. (Oh, but SAFE is another thing, especially when working with power tools. Yes, you can still go inexpensive, but don’t sacrifice safety. Just be careful and spend a little time on research) Yes, using the shiny, new, expensive stuff is nicer, smoother, less fuss, and worth the money in many cases, but they still do the same thing. Once I learned to sharpen, guess what my chisels did…they cut a mortise cleanly and pared the shoulder and cheeks of the tenon to my lines. Wow. Amazing.

Learn to sharpen. Sharp is sharp, no matter the tool. Then it’s just a matter of how long it will hold the edge. Trust me, people won’t make fun of you for your tool collection. No skin off my back if you made the entire project with a sharpened claw hammer and some pruning shears. Good for you. I’d love to see how you did it! Sure, tools can be cool, but it’s the wood that everyone really sees and cares about.

The other way to do it is to check out the used market. There is a ton of good stuff out there looking for a new owner. If for some reason you decide woodworking isn't for you, you should at the very least be able to get your money back out of it. Breaking close to even isn't a bad investment at all, considering.

Don’t get me wrong. I want some better quality tools now, but in no way do I regret the paltry amount I spent to get going. Shoot, I’m still deciding if I like Western saws or pull saws better, so I’m definitely not going to go out and buy a custom back saw from some very good makers out there or order my next saw from Japan. That’ll come later… maybe. Currently, I’m slowly upgrading my tool set and to be honest, I have to suggest vintage tools. I love and prefer good vintage user tools, but that is just what it is, my preference. I like the history and getting them working, but that’s me.

So why am I upgrading, because my cheap tools don’t work? Nope, because I now know what I want and how I’m going to use it. I would have hated to spend all that money a year ago and then watched it collecting normal dust, not sawdust, in my garage/shop. Now I can take that $7 set of chisels, which I still use at times today, and use them to beat the heck out of stuff or scrape glue and paint off my garage floor if I want to. I can also modify my cheap, uncomfortable #5 jack plane and turn it into more of a scrub. No one said they were useless, just not as nice to use. Spend some time, figure out what you want, then go for it. The worst thing you will say is, “Man, I wish I would have had this for that one thing I did way back when.” It happens. At least now you know why you appreciate it now.

Sunday, October 6, 2013

Lessons to Learn


I look at my projects for my shop as solely practical, yet many times I'll remember to use them as practice. I don't usually paint or stain them, but I do try to add a little something every now and again to try and further my skills as a woodworker. Today was just building a small station for my cordless drills and decided that I would try to add some curves and dovetails.
Does it need them? Not really. Will anyone care? Nope. shoot, it's likely no one will ever see it, but it is an opportunity for me to take a simple project and make it just a little more appealing. Besides, it means I can spend a little more time on a project and become just a little bit better so that when curves on a project really do matter, I don't dread or fear it.


PhotoPhoto
Currently I'm reading The Joiner and Cabinet Maker. The story of the apprentice, Thomas, is quite eye opening, showing me how much he labored at perfecting his methods of work, even on just scrap pieces of wood, whether it was sawing, planing, or joinery. How can I expect to have to do anything less?
So I guess we’ll give those dovetails and curves a try...


Photo

Friday, October 4, 2013

My First Real Project

My first “real” wood working project.
There was a battle here...
 I call it that because this was what I consider my first real foray into hand tool woodworking and I can be perfectly honest to say that it shows. While working on my first work table/bench, I knew I’d need support for sawing boards by hand. I did have some plastic sawhorses, but those weren’t sturdy enough. Besides, they were just too tall to be anywhere close to comfortable for hand tool use. After seeing a project on the internet about a saw bench, I decided that project would be perfect. It would give me an opportunity to try my hand at a couple joints that I had never done before and provide a useful tool for all future projects. Looking at the tools I would need, I decided I had everything I “had” to have (handsaw) except for a set of chisels. These would be needed to chop out the mortises in the legs (and pare down to the lines that I could not saw to). Not knowing what in the world I was looking for and thinking of just a quick fix until I could do more research, I wound up at HF with a few bucks in my pocket and on a mission. Picked up a set of chisels for just a few bucks—and yes, there is a reason they are only a few bucks. I also wound up with a nice little replaceable head mallet that I still abuse regularly. It abused the chisels just fine, though unnecessarily…

Did you know chisels should be sharpened to a fine edge that should be pretty much invisible to the eye? Huh. Me neither…

Not pretty, but it does its job!
So now I have the tools I would need for very little out of pocket cost. Now on to the lumber.  I chose a wider top. I picked a 1x12. No reason, other than my brain was telling me a 5-6” width couldn’t make a good saw surface.

As a side note, Yes, I can and often do try to go my own with anything, including hundreds of years of history and high praise from current woodworkers. And yes, I am incorrect in my previous assumption about the width, but not because either was wrong or better. It just doesn’t matter. Build what you want.

An extra notch or two
So here it is. My saw bench. I beat out mortises with chisels. I don’t say cut or chopped, because I found out during this process how dull tools can hinder your work. These things fought back I think, but they were finally beaten into submission. I should really have just used the claws on my framing hammer. I’m sure it would have cut my time in half, at least. (It couldn't have been any more rough!) In all honesty, these were my first and I believe it shows. Tell you what though, I had a lot of fun and I wound up with a saw bench that has seen me through a year of service and is still going strong. I’ve “added” a few notches as I found good places to put them. The notch in the side is actually really nice for crosscutting longer pieces. I can clamp boh sides to the bench without worrying about tearout. It also stands too tall based on the suggestetd height. Mine is just above my knee. Oh well. What do they know, right?

But it works. It’s ugly, but it does its job, and I’m good with that. I’m not afraid to saw into it, cut extra notches, or spill something on it. The saw bench is a tool and I use it as one. I like it. I got to work with wood, spend time in a peaceful shop, and I realized that yup, this is for me.

This is the newer one. A few projects later
Oh! I almost forgot! Sharpening! Dude, mortises are not supposed to take an hour each. Sharpen your chisels.

Wednesday, October 2, 2013

How and why I chose hand tools...

There have been a number of projects since that first “sturdy horizontal surface”. As I’ve mentioned before, I’m not exactly sure what it was about that first project that really caught my attention and held it, but whatever it was I enjoyed the couple days I spent with it. It definitely wasn’t the temperature—it was HOT. Summer in the southern Arizona desert…it’s always HOT. Maybe part of it was the research I did first, learning about all the different styles and uses for workbenches. Add to that the pure enjoyment I experience from working with my hands again, actually doing something that I deemed useful and had a clear “end product,” was a nice change of pace.

No matter what happened, something clicked and I started doing more research and building. I immediately knew I wanted to do more, so I started looking around for something else to become the new mission. As I flipped through pages and pages in books and the internet for information on projects, how-to articles, and videos, I found myself realizing that I did not have all the tools required to make these projects. I had a basic mechanic’s tool set, a handsaw (remember, crosscut) and a cordless drill/driver. Oh, and a VERY cheap circular saw that I picked up because it was on sale, and I figured, “Eh, why not? It might come in handy.” (Honestly, I think I’ve used it 4 times in the past year, but that’s another story.)


Based on my limited tool-set and skill-set, I knew I’d have to start slow. The skill-set I knew would just come with time and practice, but I can deal with that. The tool-set, however was a different animal all-together. I had a two car garage and one area had to be used to house a vehicle. Our driveway wasn’t big enough to hold a car, so it had to go inside. That left me with about 1/2 a garage, if that (you know, storage and stuff), so the nice table saw, band saw, jointer, planer, and dust collector, as cool as they are, probably weren’t going to be feasible (even if I were to have a mad stack of cash in my sock drawer that could pay for it). So that left me some limited options:

1)      Buy a table saw. You know, these are very heart of a wood shop, right? You can do EVERYTHING with one of these. Sure, I’d have to move stuff back and forth in the garage whenever I wanted to work, but that is just the price I’ll have to pay. You have to have a table saw to do woodworking. All the books and videos show nearly every task being done on one of these things, so I’m sure this has to be truly a necessity. Sure, I’ll have to save up the money for the next few months, but it’ll be worth it…won’t it?

2)      Deal with what I have. I made the first bench, right? It turned out kind of ok. It definitely serves its purpose.

3)      Start with option 2 and then buy what I need as I go. When I need a tool, I’ll break down and buy one. When I can’t do without the table saw, I’ll go buy one.

4)      Quit all-together. I obviously don’t have the funds it takes to work wood like these other guys. I mean, look at their shops!!!! They have all the cool toys! You must really need all that stuff to have a good end product.

Lucky for me, I chose option 3. Partly because I didn't have a pile of cash and in part because I honestly didn't know what I wanted or needed. I started to learn that there were many different theories and styles of woodworking, the main three being: power tools, hand tools, and some mix or hybrid of the two.

At the time power tools were just too darned expensive and big, especially for a newbie, so I decided that hand tools may have to do for a little while. Besides, I was extremely interested in the hand tool genre. To this day I'm still amazed at what can be produced with our own hands.

My first plane. No, I'm not too proud to admit it.
So there we have it: why I chose hand tools. At least at first. I've made a lot of mistakes in my purchases (one is as good as another, right?) and have now started to acquire the tools of the trade as I go. You'll get to see more of those as we go along, so be patient! Hopefully I can keep others from some of the same mistakes I made. I'll try at least!

Awww alright. Here's a glimpse of some of my user planes I'm in the middle of restoring. The one above (a cheap "#5") I converted to a scrub plane. Hey, it works...


Here some of them are. All usable and getting cleaned up.

Tuesday, October 1, 2013

Introducing myself and how Woodworking wasn't quite what I expected...


Not everything in this world turns out just the way I want it whenever I start a project. I'm not exactly sure why, but it just rarely turns out that way. One thing I've noticed, though, is that it doesn't matter. Not to me, and not to my woodworking. For once I don't find myself getting crushed (or wanting to crush something/one else) when I'm in my shop. It's kind of nice!
Pre-fitting my first dovetailed box

    I have spent about a year learning as much as I can about woodworking, and especially working with hand tools. By hand tools I don't mean circular saws, jig saws, and hand routers (though I do own them), but the tools of my father and grandfather, such as hand planes, hand saws, and the good ole brace and bit.
    I'm not precisely sure what got me into these tools. One day I decided I needed a sturdy workbench for my garage. That was it. Nothing else. The idea was that if I had to work on my car, a nice,  flat, horizontal surface would really be handy. I wanted something really sturdy so I spent some time doing some research. I needed something simple, but really strong (who knows when I'll have to toss a transmission on the thing), and settled on a torsion box design similar to Tom's Torsion Box Workbench. Simple, sturdy, and extremely inexpensive, especially when you consider I had to settle on a 2'x4' design, as that was the max length I could fit into my little coupe. A couple pcs of plywood, hardboard, and a few 2x4s, and I was home free...except I couldn't afford the expensive miter saw, electric drill, and circular saw. I figured I could afford the drill and a handsaw (it wasn't until about a month later that I found out that I had purchased a "crosscut" saw) and that's exactly what I bought. No more and no less. It was good enough.
    I loved it. It's not that the workbench turned into something absolutely amazing. It didn't. I just enjoyed the time I spent working with wood. I rushed it, didn't follow directions, made a ton of mistakes, but I made it work and still use it to this day for many tasks. You can see below that I didn't create a piece of art, but just a workbench, and I really have to say I learned a lot from a simple project. It was awesome.

Frame almost done

Done enough for me at the time

So since then I've made quite a few projects (for a guy who only gets to play on the weekends), and have been dying to share some of my experiences with anyone or no one, whoever may be out there that wants to hear about my silly mistakes and silly successes. They're all pretty much same these days.

So stay tuned if you'd like to see more projects, pictures, and hear more about my foray into the world of woodworking in the past year and moving forward!