Showing posts with label hand tools. Show all posts

Sunday, January 5, 2014

Side Table 3.5

Today was a day of finishing cleaning up the garage after the garage sale, mowing the lawn, and then squaring up a couple of the laminated legs. As tomorrow is the surgery, I wanted to get quite a bit of work done on the table since I will likely be prohibited from doing much of anything for a while. Unfortunately, that didn't quite happen as my hand started to ache and swell while planing. Fortunately, I was still able to make some mouse a very cozy home.

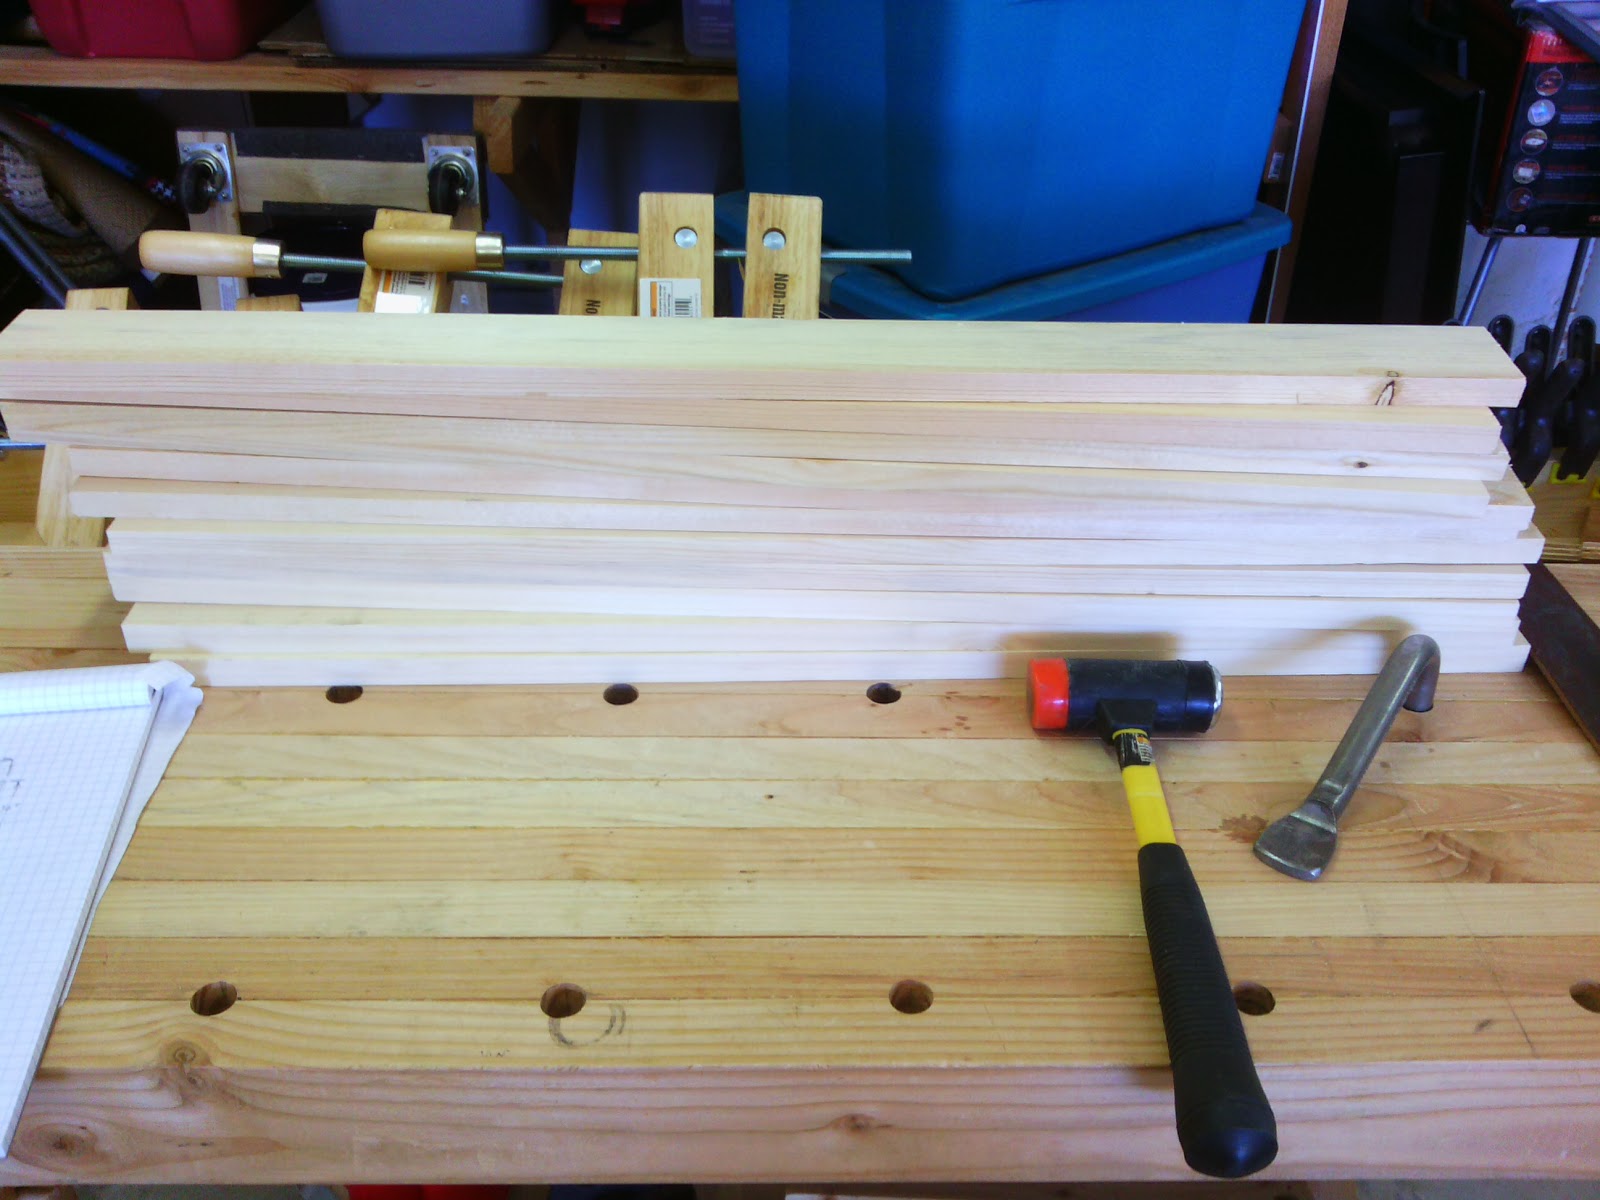
The glue-up from a few days ago was horrible. Here is a picture of one of them. I figured I could deal with the problem while squaring, but I wasn't planning on dealing with as much twist as I had put in the laminations during glue up. I had figured the laminating process would have been the simplest I've done to this point, and to an extent it was, but I should have paid much more attention.

Started with cleaning up the major squeeze out with a chisel. This keeps my plane from having to deal with it and possibly damaging the blade. Then it was on to some quick sizing and roughly getting them square with my freshly sharpened #5.

Finishing off was the #7, the first plane I ever rehabbed. This made it nice and flat once I had the majority of the squaring done. A little help from my #4 helped to get a couple minor troubled spots. I actually stopped with the #4 as the chipbreaker wasn't seated right and clogged up on me. This will take some fettling that I just didn't have the stamina for today. My #603C came out to play instead for a bit. I actually think I might like it better than the #4, but that will take some more play time.


And this is the first one, I think. Both came out really nice and ready for cutting to length and some mild shaping. The size comparison on width between these to are within 1/16", so I'm calling them good unless I have a major fail with one or both of the other two and some shrinking needs to be done. I just know that if I keep playing, I'll just wind up with bigger piles of shavings than contained within the first picture.

Until next time, when we finish the other two and start trimming/fitting the top! --Josh

Thursday, January 2, 2014

Side Table Part 3

So today was a little mixed up due to dealing with insurance and trying to get my surgery scheduled so I can get my finger put back together like it was meant to be, but I did get a little time in the shop. I was going to start on the table legs and get them planed square, but as I was setting up a planing stop, I had and idea in regards to the top. I realized that making breadboard ends as suggested to run the full length of the piece would be the best bet ( as nicely suggested by a reader), but then also thought of a different take on the same method for doing the top. Instead of doing one long top, I could create sections that would all slide together. This does two things: limit movement so that it will only be in small sections going front to back, and also give the top more "flair".

In trying out the tongue and grooves, I realized I don't have a cutter for my No. 45 that will go a full 3/4", at least not a 1/4" width. Also, the only 1/4" cutter I have was not a part of the set and doesn't seat in the holding mechanism on the plane, as it is too thin. This I fixed with several layers of aluminum tape and was able to test some tongues and grooves.

Now I had to practice. This is really the first time that I've used the 45 on anything other than a practice board and I didn't have a whole lot of good luck with it. For some reason, this time worked like a champ after a little fiddling.


So now the grooved test piece is done, so now it's time to try and create the tongue. I cut several boards for practice, as I noticed the last time I used my rabbet plane, I also got mixed results. I set it up based on my groove measurements.


The first shot was a little loose, but not really a bad fit overall. I made the most minor adjustments that I could and tried again. Good fit. Try again. Too tight, touched it up, and good fit. Another...good fit. One more....again good. One more piece for good measure.


Now it's time for the real stuff. About twenty minutes and all the grooves are done. If the tongues go as smoothly, I'd be surprised, but we'll give it a shot tomorrow...

Oh, and no, I'm not worried about covering up the exposed edges. Others may not like it, but I like the thought of seeing how it was put together. At least for now...

Until then!

Josh


Wednesday, January 1, 2014

Learning Woodworking and Side Table Part 2--Questions

So I've been thinking about this post for a couple weeks, and figured that since I hit a perfect example today, I'd go ahead and do an extra post.

I really admire those who get the opportunity to learn from or at least watch an experienced woodworker. As much as I know I am capable of learning on my own and with the help of books and the internet, I don't believe there is a substitute for hands-on instruction. I can learn to plane, saw, and drill with those instructions available to me, which means that I can also learn to dovetail, mortise and tenon, and other general joinery. It's just going to take a lot more time and practice since I can't see the fine details of how something is done or even have someone tear apart my work with well-meaning criticism. Instead, all I can do is try to tear apart my own results, appreciate the work and time that went into it, and vow to do better next time while noting what I think probably went wrong. Maybe I do better on the next one, or maybe I don't.

I believe the most difficult thing to learn for me is how to visualize a piece and know what type of joinery should be used. I can read and read and read until my eyes roll back into my head--and yes, a little bit does sink in--but until I do something with it or see it explained on the workpiece in front of me why I should or should not use a style of joinery, I'm just guessing. I'm not one who generally likes to copy work someone has already figured out. I've done it and will do it again, but it's just not my thing. I don't learn from it, other than sawing, drilling, chiseling, etc. At times I believe I'll just be learning by seeing what furniture blows up.

I do halfway understand wood movement, but I don't know how to control it or compensate for it. What joints are good to use in those types of situations? I do know the smaller the piece, the less it matters, but now I'm getting into real pieces of furniture. And that brings me to the current dilemma on the new side table, which I'll get to in just a minute, right after I catch everyone up.

I was also to get all the boards for the top cut today and decided to lay them all out to see how it would look. I also needed to figure out how I was going to do the joinery on the table itself, and make sure the ideas in my head were still going to look the same (or similar at least) in real life.

I was going to half lap the long edges of the top and then peg and glue each joint, like a breadboard end, but just lengthwise. As the top will be made of 14 pieces laid side to side (these are 14" long, which is the depth of the piece) I was going to laminate them all together and then rabbet the long edges (across the grain) for the "breadboard" edge. I'd leave space in there for the wood to move in the length.


The other half did not quite agree, and she likes it better with the exposed end grain, which I'm okay with. This just means I'll create a frame underneath and attach each piece to the frame. This will keep them all from warping or bowing. But how to attach them? If I use glue or pegs, won't that create too much stress in the top due to seasonal movement?

Again, this is where learning from an experienced woodworker would come in handy. I can make this table look pretty darn good, but I also want it to last. I'm not worried about the table getting beat up, but I'd rather it not become firewood as soon as the desert experiences some type of freak humidity or I move back to the Midwest and find myself furniture-less.

So that is where I'm at for the moment. I'll do some more reading and research, looking for examples and such, to see what the world has accomplished before me. I'm sure I'm not the only one!

Until tomorrow!

Josh


Table part one

Well I had most of my boards ripped and planed flat on 2 sides in prep for the leg laminations, as there are no local stores that offer any material thicker than 3/4". Somehow I needed 5 more ripped and roughed to length rather than the 2 I had figured in my head. No big deal. I ripped an 8' board with a newly sharpened rip saw. This was my first real test after I sharpened my first saw...excellent! I know it's soft wood, but it took about all of 3-4 minutes to go the full 8 feet.

Since I took these from a wider board than the original pieces, I actually had less to flatten in prep for the lamination. Almost no shavings required to hit the floor...bummer. I usually look forward to that part.

Now it's time for the glue-up, so we'll see how that goes. I'm not generally very good at laminating, but since these will be small, only four boards, and glued on their faces, this should be a little easier...yeah, right.

Three of them turned out decent, but the fourth? Not so much. There will be a price to pay on that one. They had shifted out of "square" and so now have a twist. I think I'll be making a new leg rather than planing it all down, since I'd also have to change the sizes of the other 3 to match.

Either way, I now have 3 usable and 1 possible. We'll see where that goes when the dust settles and the glue dries.


I was also able to cut all 14 pieces of the top. Now I've run into another dilemma though that I'll explain and request assistance on another post. This one is long enough and I already tend to get a little wordy. For now I'll just let the glue dry on this one...

Josh

And the Next One...

Ok, no one is allowed to make fun of the sketch...everything/everyone starts somewhere. So the sketch doesn't do it much justice, but this will be my next project. It's a sideboard/sofa table. I call it both as initially it will be used as a sideboard, and later, I want it to be able to move into the living room if possible. The primary reason I'd like to make it dual purpose is I will leave a true sideboard for a future project, which will be more complicated than the piece of furniture I will be making this time. Baby steps...baby steps...

Since it can be used as both, there were some limitations. It couldn't be over 30" tall. I didn't want it more than 14" wide so that it would be out of the way no matter where I put it. And the other half said it couldn't be longer than 48". Okee dokee, message received. The top will be made of laminated 3/4", along the width (if I explained that right, each board will be 14" in length). This will somewhat match our new dining room table.

So I spent the morning with a quick sketch of the idea and sharpening the tools. Oh, and setting up the blade on my "new" Bedrock 3C. Cool find at a local antique shop. Only fault is the lever to adjust the iron is broken. Not a problem, as a couple taps with a mallet make the world better. This one will need a little TLC before too much use, but it is usable for now. Sole is flat, frog is flat and seats well, and the chipbreaker is nice and tight against the blade.


Today I didn't get too much past this point, but I did get 2/3 of the boards cut for the legs and planed flat for lamination. The legs I plan to be 2.5" square when all said and done.


Here's the leftovers from the flattening. I love seeing piles of shavings like this. That and the pine smells so good in the shop.

And why pine? Mainly because that's about all I can get here in the desert, as there aren't any woodworking stores anywhere closer than 3 hours. That and it's easy to work with (and learn with), inexpensive, and can make some beautiful furniture. Yes, it does ding a little easier, but it still looks good and serves its function.


So I guess that's about it for now. I'll be spending as much time as I can out there for the next two days, as my surgery to reattach all that stuff in my finger is supposed to be on Friday if the insurance stuff all goes through....but that's another story. Till then, be safe and have fun!

Josh

Monday, December 30, 2013

Sharpening...yeah, everyone has to do it.

So here is a quick little note about what I do with sharpening. I figured since I got to experience it first hand (pun kind of intended), I would spend a few minutes on it. It seems like everyone does, so why not. In general, the method that I currently use is sandpaper. It works, and to start out, it's nice and inexpensive. In the long run...not so much. My more permanent method will likely include diamond stones, but I still have about 6 months of good paper left to use, so until that time, no life-altering decision required.

I keep all my sharpening supplies in a little cabinet I made when I first started a little over a year ago. It is actually the only thing I've made out of plywood. It keeps all my sharpening tools clean, organized, and near-to-hand. It's not perfect in form, but its function is spot on.


There are three removable trays sitting on guide rails that contain all of my grits glued to sheets of glass and mounted on 3/8" plywood. At the top is a removable drawer that holds my sharpening jig, polishing compound, a small screwdriver for removing cap irons and tightening iron in the jig.


I also set up a jig to maintain consistent angles when sharpening. This makes sharpening sessions repeatable which is incredibly important. I have one station set up for establishing a primary bevel on planes. Another station sets the secondary bevel, and the final station is for chisels. I do the secondary bevel on chisels by hand. This is on the right in the picture, held in place by the holdfast.

Someone may want to know how often I sharpen...well, that depends on the tool, the type of wood you're working with, how much you used the tool, and how hard you are on the tools and the tasks being performed. My chisels I sharpen constantly. No, I do not start at 220 up to 2500 and then polishing on the strop every time. Instead, I keep the strop handy, and when I start to feel a difference in the chisel, I polish it. A couple quick swipes is generally all I need. When more than that is needed, I'll usually start around 1000 and work my way up 2 grits to the 2500 and then polish. You'll find that sharpening can be super fast if you stay on top of it. The more dull the tool is, the more time it takes to get it sharp again because you have to start at lower grits to reestablish the bevel edge.

All together, my 4 Stanley plane irons and 5 chisels take about 45 minutes for me to sharpen. If I've got some heavy sharpening to do, that could easily double my time (nicks or establishing a new bevel). This is why I generally sharpen before any project begins or when I can notice a difference in the working of the tool--I don't like to spend a lot of time sharpening. A good time for me is at the end of a project. Since I pull my irons and clean all the shavings and dust out of my planes, 1/3 of the job s already started. Keeping everything pretty sharp and never letting my tools get dull means I am not forced to spend a lot of time mid-project on re-sharpening. Cleaning an edge up a little? Sure. Not full-on sharpening, though.

So, I guess that's about all I can think of right now on this subject, unless someone asks me something that I missed. Oh, what is sharp? It changes the more you do it. The better I get at sharpening, my mark for sharp tools keeps moving up. I have a feeling it will keep doing that.

Until the next one,
Josh


Sunday, December 29, 2013

Well...huh...oops.

I know it's been a little quiet lately, and for that I apologize, as that was not the original intent. Fortunately, it's been an eventful Holiday season, but unfortunately I had a fairly severe workshop accident as well a day or too prior to Christmas. I was paring some end grain when I shifted just wrong and my knee gave out. I moved my off hand from over the blade to out in front to try and catch myself on the bench. Sadly, not all my muscles did the same thing at the same time and there was still a little forward momentum on the chisel. To summarize, instead of dropping the tool, I "decided" to stick it into my finger, severing two tendons and a nerve in my index finger. Oops.

After 3-4 hrs in the ER (drove myself) I got a couple stitches, a surgery scheduled, and a compliment on how sharp my tools were. No marks on the cartilage or bone, meaning there wasn't a whole lot of momentum, just sharp. Good job I guess?

Word to anyone out there: Tools are replaceable. Try to drop them rather hurt yourself. I know there's usually not enough time to think and act, but if for some reason there is, just let go.

So enough about that. It interrupted things for a few hours, but accidents do happen and unfortunately, this was one of those that I'm not sure if I could have avoided, other than sitting for some of the finer chisel work. My knee evidently cannot be trusted.

And here is the project I'd been working on. It is a drink carrier for a good friend of mine.
It's made completely of oak and in a future picture will be finished with a semi-gloss poly to protect it from the mild moisture from whatever drinks may find themselves in the carrier. Yes, there was blood on one end, but a scraper plane and some mineral spirits took care of most of it. Here are some pics from along the way:
The ends hold the 2 pieces of loose 1/4" oak that make up the bottom of the holder. The bottom will be contained by the sides of the holder.
The card scraper did a wonderful job after I trimmed down the dowels. Everything nice and even. For some reason it was actually easier with only 1.5 hands, and I'm not sure why.
And yes, I couldn't stay out of the shop after the accident. The same day I actually finished up what I'd been working on...

and the poly...

Overall, I thought it turned out great. The project was done just in time, even with the interruption, and seemed to go over very well. So now it's on to the new projects. I also have quite a bit more to share from the last couple weeks, but those will be on other posts. 

I hope everyone had a very Merry Christmas!


Josh


Sunday, December 8, 2013

Realization

Well, suffice it to say, I have determined that I despise sand paper. I do not like dust. The repetitive motion with super slow results frustrates me. Believing it to be complete, wiping the piece off to admire your work, only to see a non-uniform surface staring back--almost angers me. I really like the planed surfaces, uniform (other than the tool marks, which don't make it look sloppy at all) in appearance and easily left or lightly sanded prior to finishing.


To get rid of the dust was simple enough. I built a sanding station that would keep the dust out of the air and hook up to my nicely muffled shop vacuum. That took about an hour, though most of that time was spent looking for my off-cut of peg board.

And so we have what I have been up to lately. I was able to finish a couple more of the holders, and developed a design that was quite fun to make, used several skills and tools, and also required little sanding. The same blank was used, about 6"x6", and most of the waste was sawed away, and then planed flat. This design was different from the others and a little faster moving so I also used it for a couple more. Overall, a nice little diamond shape when looked at from above. I like it, and it also received the nod of approval from the other half.

Sadly, though, the entire thing came to a crashing halt when I had to dig out the sandpaper to finish the other ones which had been touched with saw, rasp, and file until there was nothing left but smoothing. Ouch. Have I mentioned I do not like this part? I did get to use my new dust sucker though. That worked out quite well. 

So now I have quite the variety sanded, about half of them I'd say, and am procrastinating sanding the other half. Again...I don't enjoy it. Lathe is more fun. Let's do that and get a piece ready.

And then not do anything with it. My flywheel is riding on the headstock because the shaft tightened up more than I guessed it would. Dang it. It's just not my favorite day. We'll clear that out next week. I'm done and need to see my other half for at least dinner...or at least that's what she told me. Be right there!

Josh

Friday, November 29, 2013

Whew! Made It!

No, the title doesn't speak of some grand project completed, but more of my complete avoidance of the cursed Black Friday. Not once did I step foot outside the shop to venture forth into an unknown world of crazier than normal folks. It just didn't sound like a good time to me, so I didn't do it. Nor last year...or the year before that...

I figure I can buy the stuff that others and/or I need at any time, so why would I try to wrap that up all in one day? With thousands of other people--who all want the latest electronic toaster that emails you when the toast is done more than I do--I'm just not sure that I could compete. Oh well...

So instead I puttered around the shop and practiced. I've been somewhat tired of the same projects, so I glued up a couple more and set them aside for the day. Today I was going to practice grooves and dovetails. A box it is then.

I already had some pieces cut from last weekend while I was waiting for the glue to set on the gift projects.

Then marked the grooves that will hold the bottom. I didn't have a grooving plane, so this will all be done by hand.

Chiseled the waste and evened it out by hand to get it close.

Then cleaned it all up with a router plane. Oh, and these are stopped grooves, so nothing shows after the box is assembled.

All four pieces all came out better than I thought they would.

Now it was time for the dovetails. The pins are lying. I actually do tails first, but I forgot to to take the pic, so this was just an afterthought.

They fit together pretty well. I was pleasantly surprised. This was done with the "new" saw I just tried to sharpen. Seems to be working pretty well and I like the way it feels.

And the grooves line up, too, with no major gaps from the inside. Yippee! Two for two!

The rest of the dovetails went pretty well. I noticed my saw has a little wider kerf than I'm used to, so there were some adjustments to be made, and I improved with each cut. I also improved quite a bit on my chiseling. The bed of the tails and pins all came out pretty square and flat. Much better than my last attempts.

Then it was ready for gluing and clamping.

And now it just needs to finish curing and will be ready for planing down the proud pins and tails tomorrow. All-in-all a good day of practice. Even got another of the gifts glued up and ready for shaping tomorrow.

And another Black Friday insanity avoided.

Josh